This project is a revised version of the Galet, which was the project I came up with when trying to make a smaller version of the Flowerbliss, so essentially a third iteration on the same object, each time using some updated components.
From a functional point of view the main difference is the size : Flowerbliss is meant to be hanged on a wall whereas the galet is an object that you can bring with you anywhere, attach to your bag or your fridge, etc. On the inside though, everything has changed : I started Flowerbliss a long time ago and back then the only way I could make my phone and the LEDs interact easily was to use the IOIO board and good old bluetooth. Fast forward to now and you have way more options, most of them BLE-based, which means the device doesn’t need to be tied to a power supply anymore.
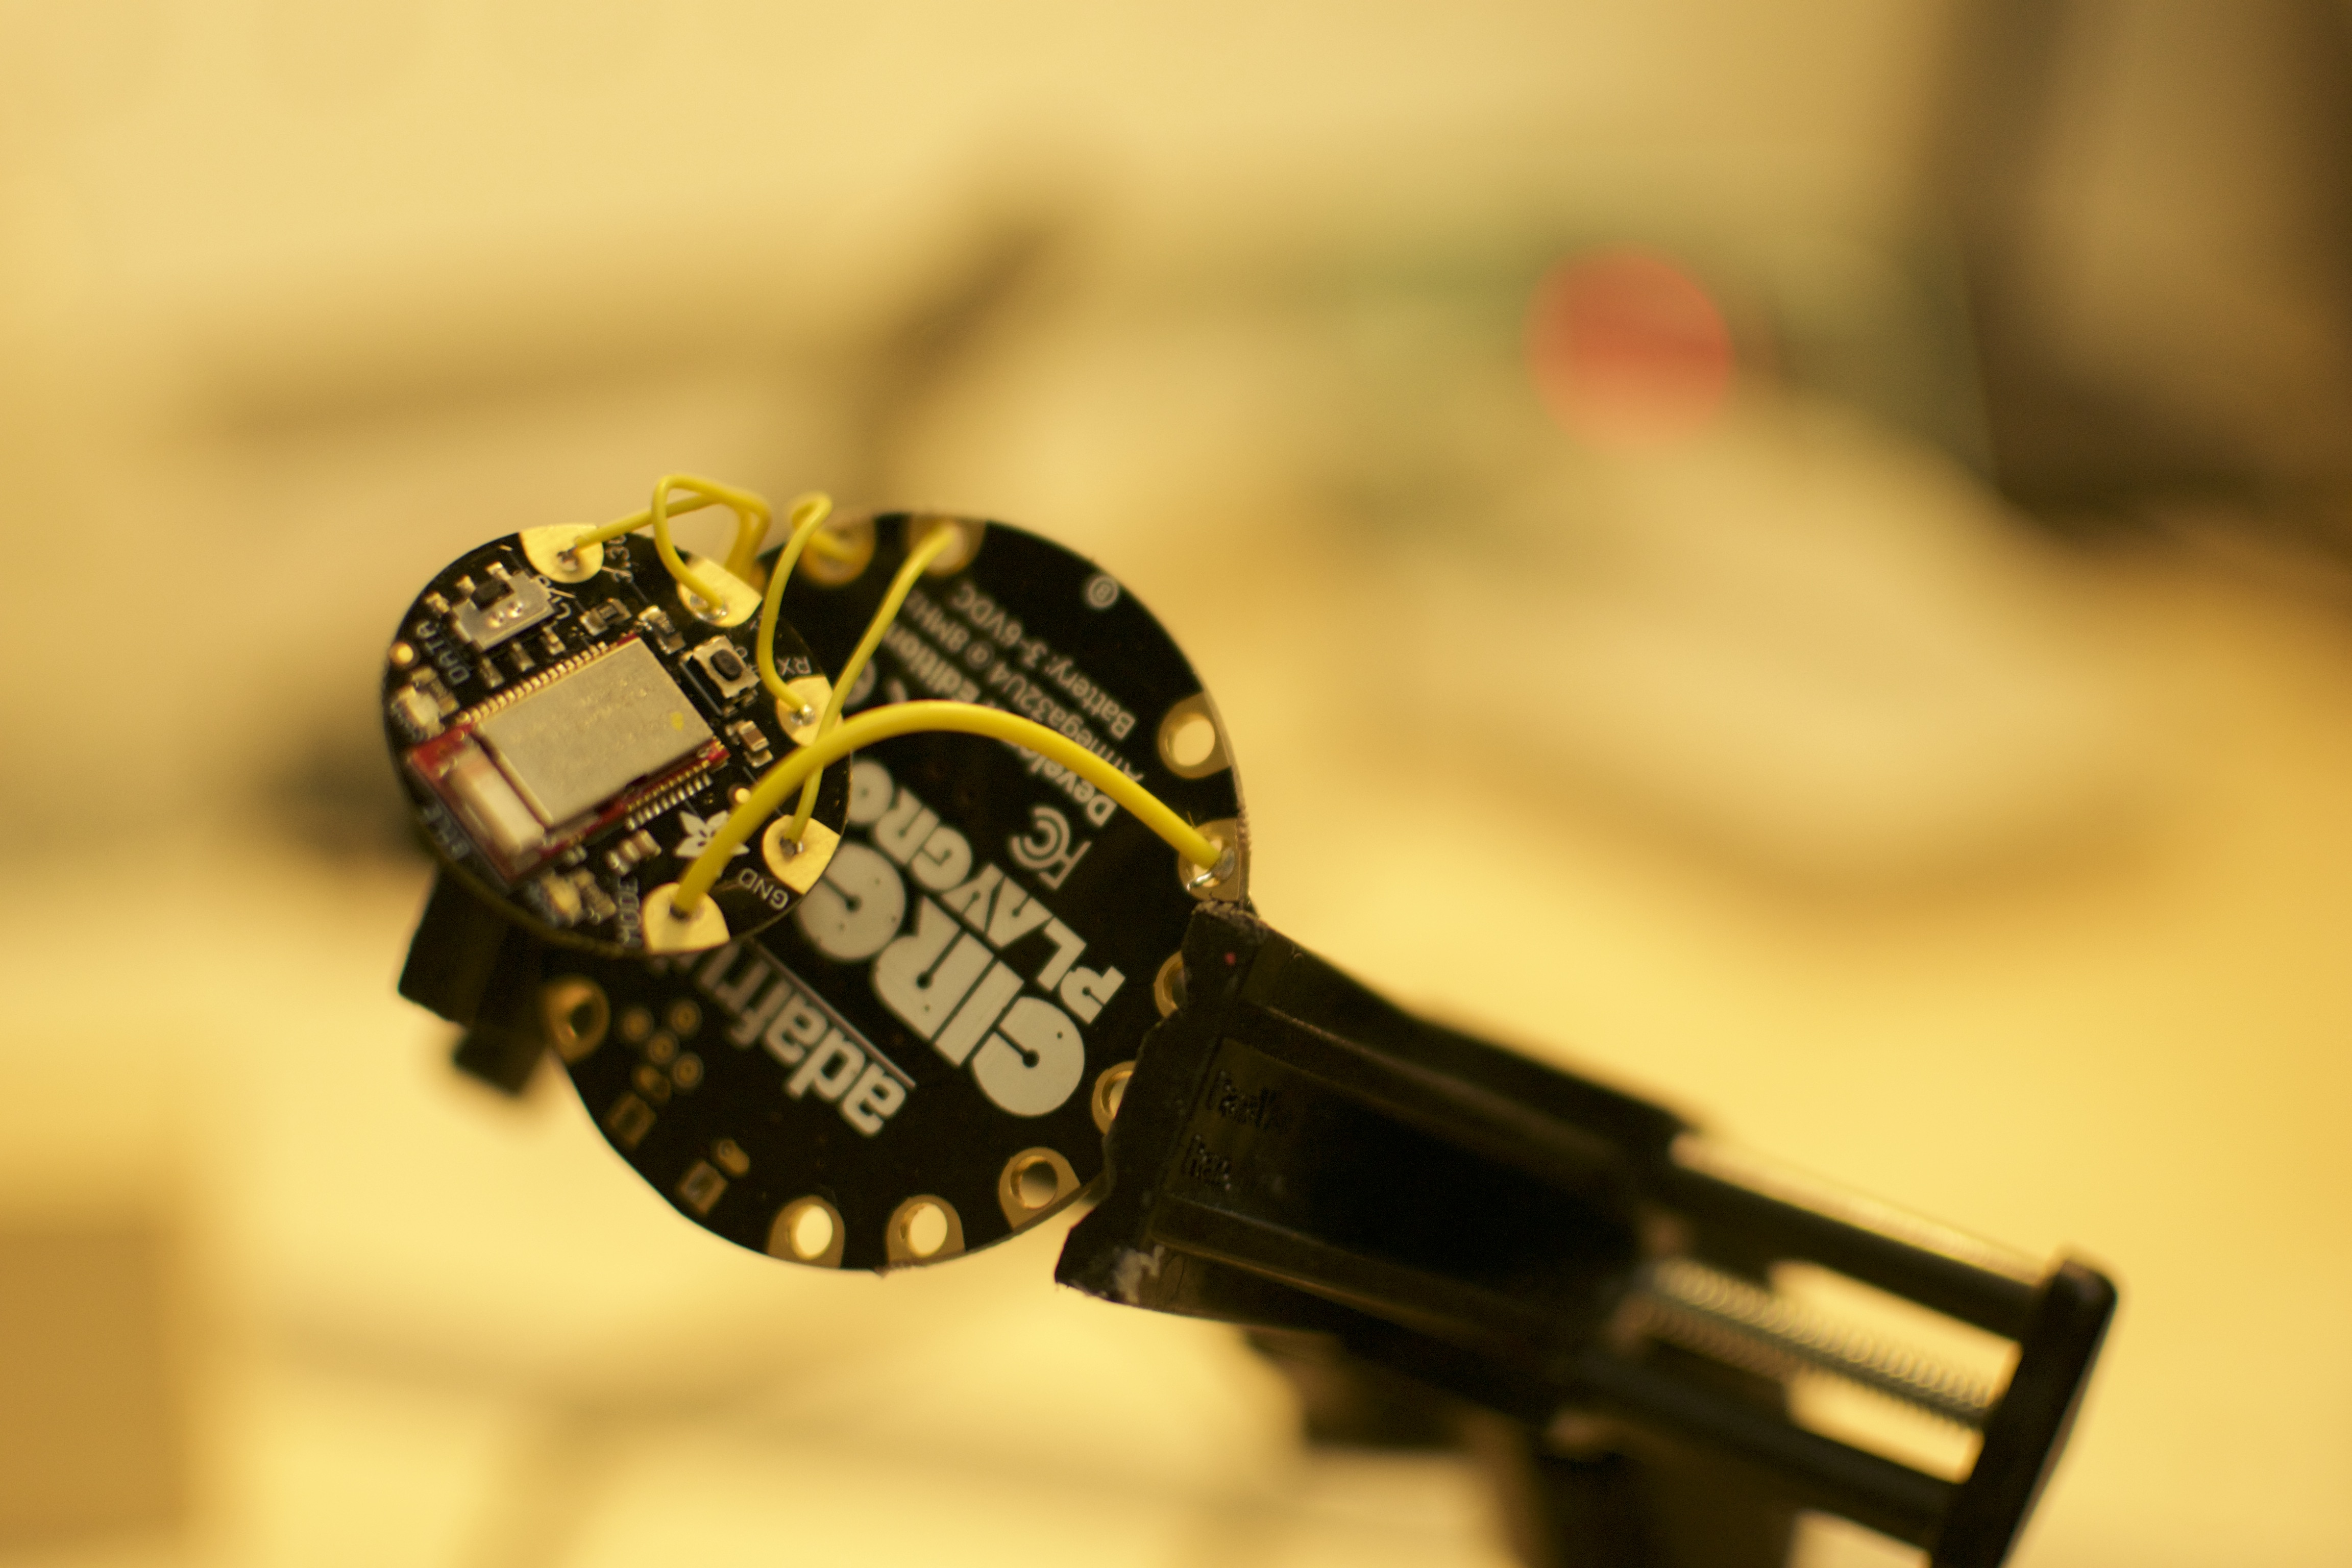
I chose to use the circuit playground from Adafruit because I found it to be an elegant way to have Neopixels – among other things – built in on the main PCB. I added a Flora-form-factor Bluetooth module, a micro USB LiPo charger and I was good to go. More on those choices later though, as I found out I could have made things even easier.
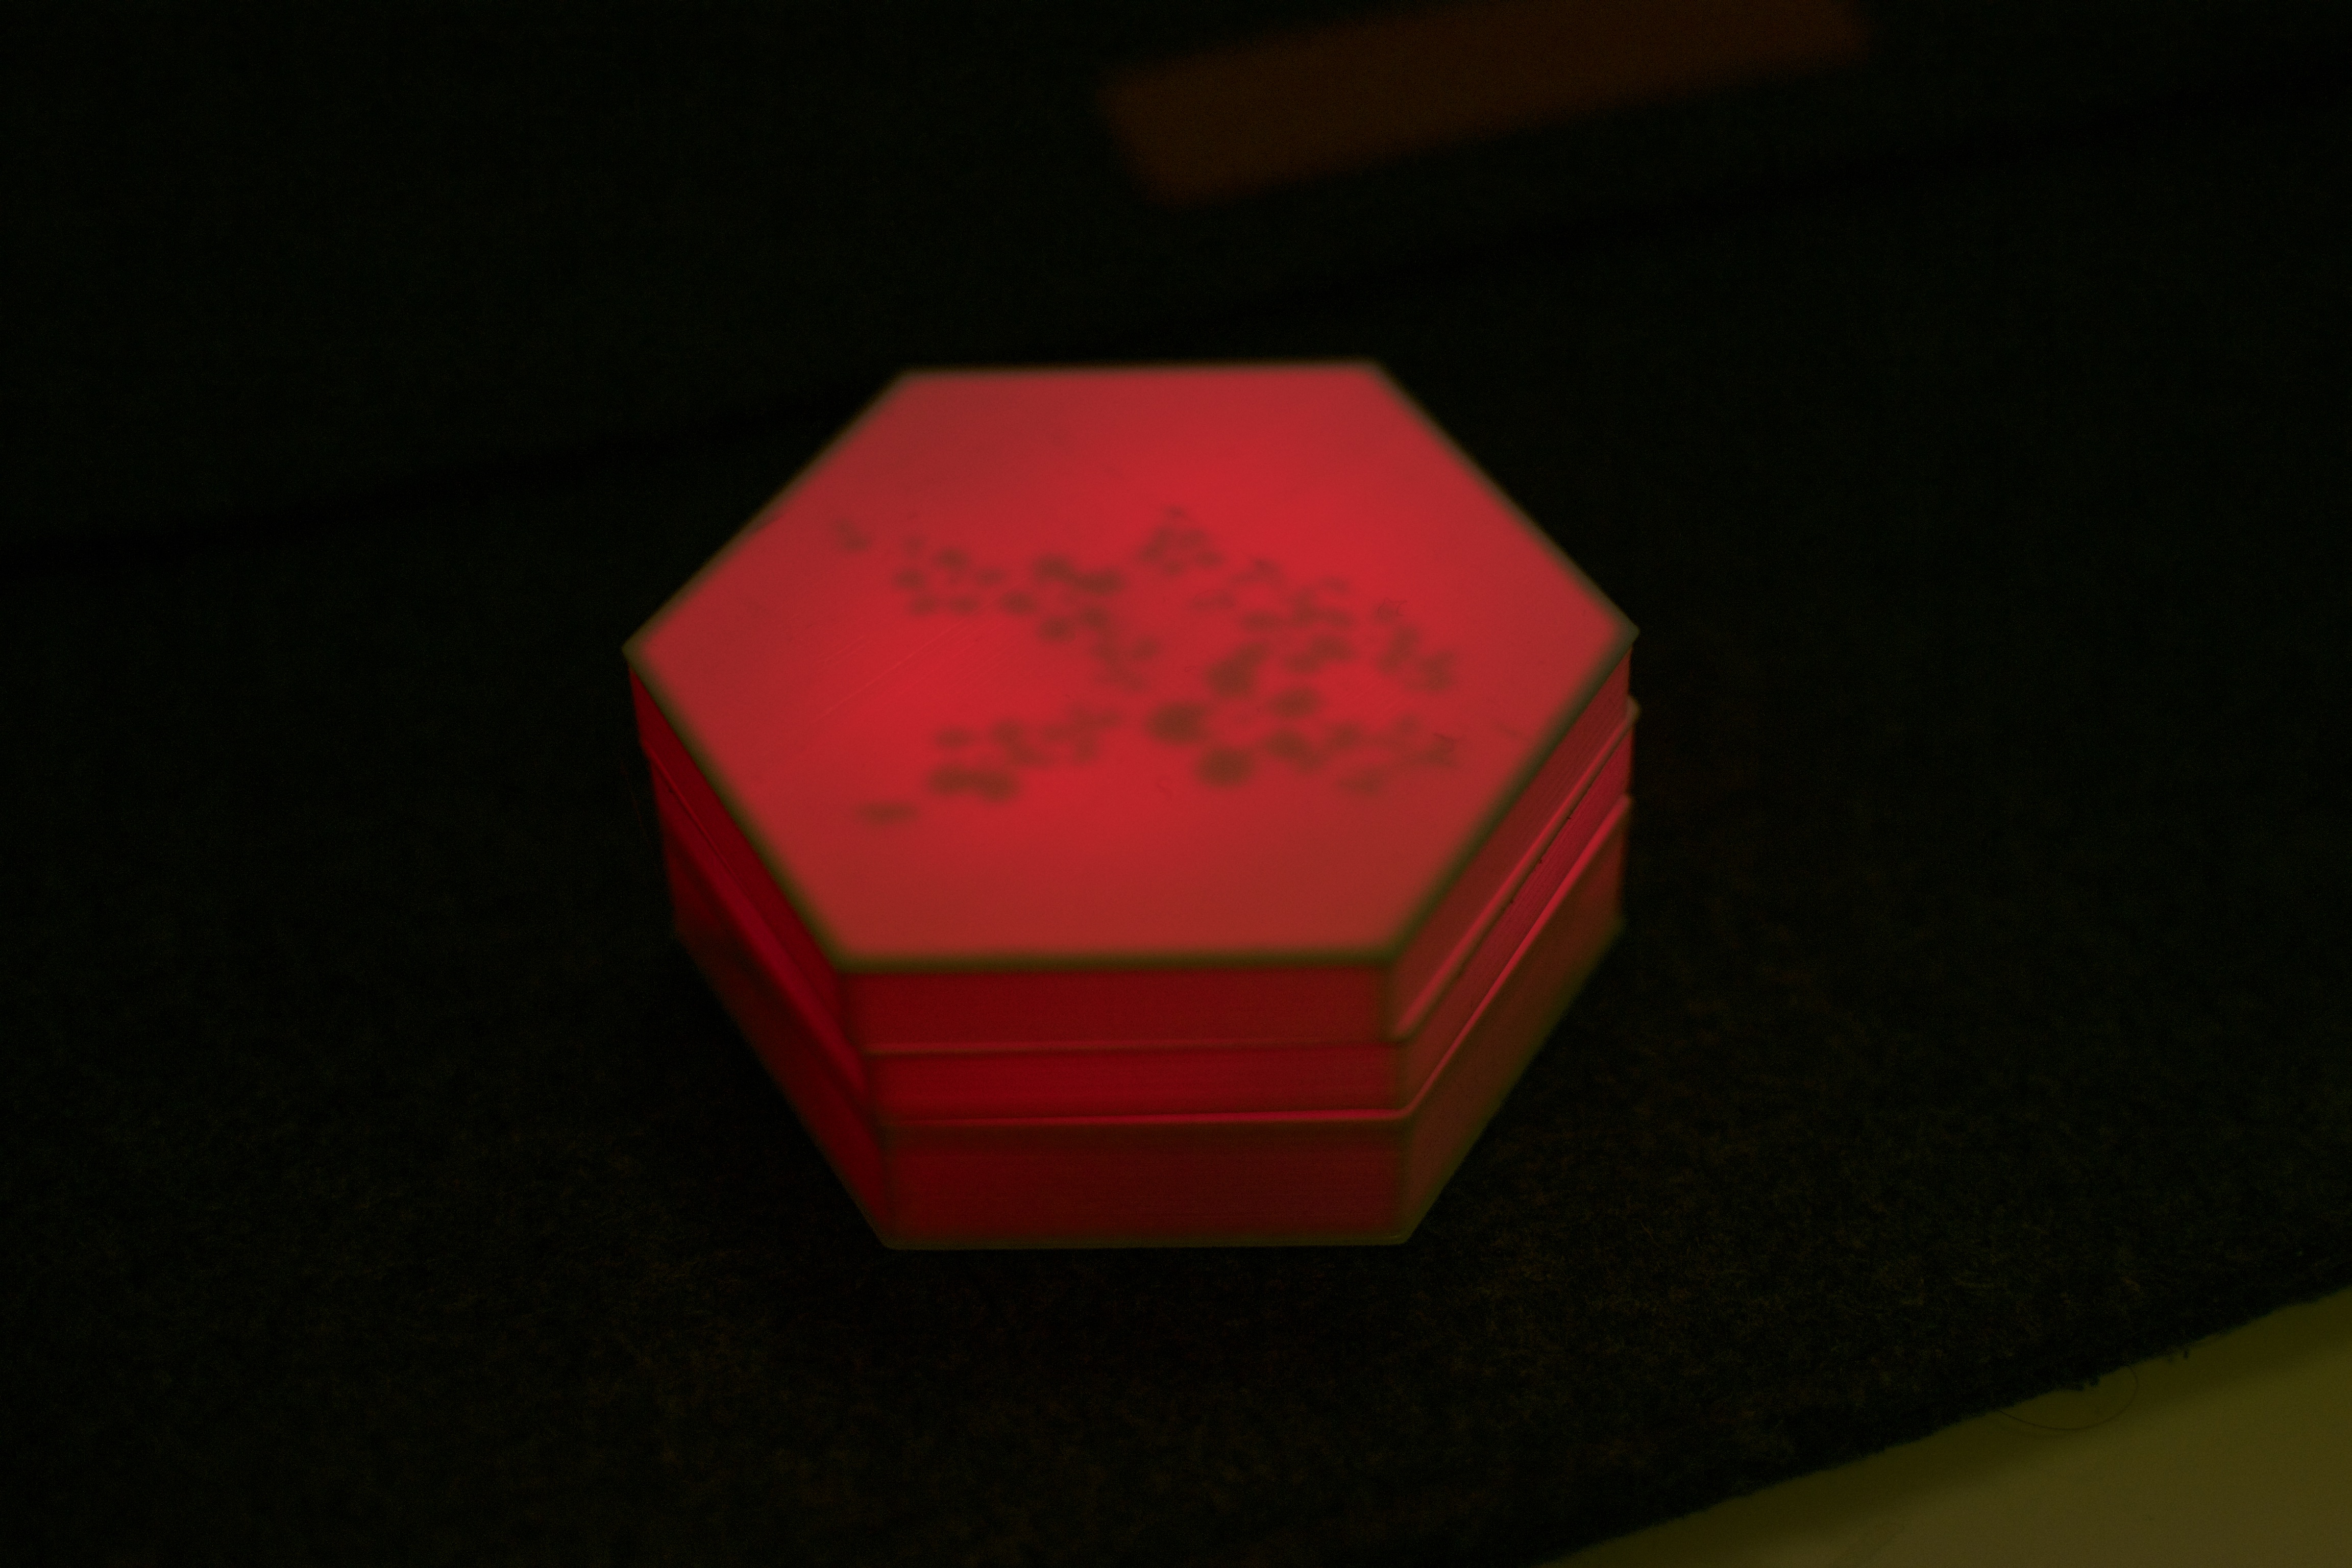
As far as the Arduino code goes, I actually reused the Circuit playground Neopixels + BLE demo from Adafruit which actually makes the circuit act as an UART : the received content is then parsed according to a series of rules defined in the packetparser.cpp file of the demo. All I had to do was to add my own use case, with a new letter and custom length. The reason I did this instead of reusing the existing Neopixel part is that I’d like to add pattern and animation, which means I’ll have to send more than just one RGB value. Moreover, I want to Neopixels to stay lit up only a couple of seconds to preserve battery life.
The electronics part is pretty straightforward :

(no, my battery is clearly not that big)
And now the IRL version :
On the Android software side, I also had to start from scratch : back when I made Flowerbliss, I had to declare the app as an accessibility one in order to intercept notifications since there was no other way of accessing them . This has changed since Android 4.3, where the Notification management API was introduced (it was about time, but that’s another topic) : the app just registers itself as a Notification manager (you still need to enable it in the settings) and without doing anything else, I receive every notification along with the time, some text and the most important part : the package name of the app that triggered it. Right now what I’m doing is pretty basic since I just load a list of the apps directly in the code (the ones I wanted to use the galet for, GMail, Whatsapp, Facebook, etc.), and I have associated each package name with a color. The next step would be to display that list to the user and allow them to change the colors – I have created the appsetting object and can display the list but have yet to add the color picker part.
Adding Bluetooth connectivity to the app was a little tough at first since the BLE module does not come with an SDK per se – I guess I was used to the BLE Bean which is clearly intended for people who want to create their own products, whereas Adafruit has an app that covers what 99% of the users might want to do. So I shamelessly (ok, with a little shame) used their code, which happened to be on GitHub, to make sure I was handling the connection/disconnection/sending the UART values part OK.
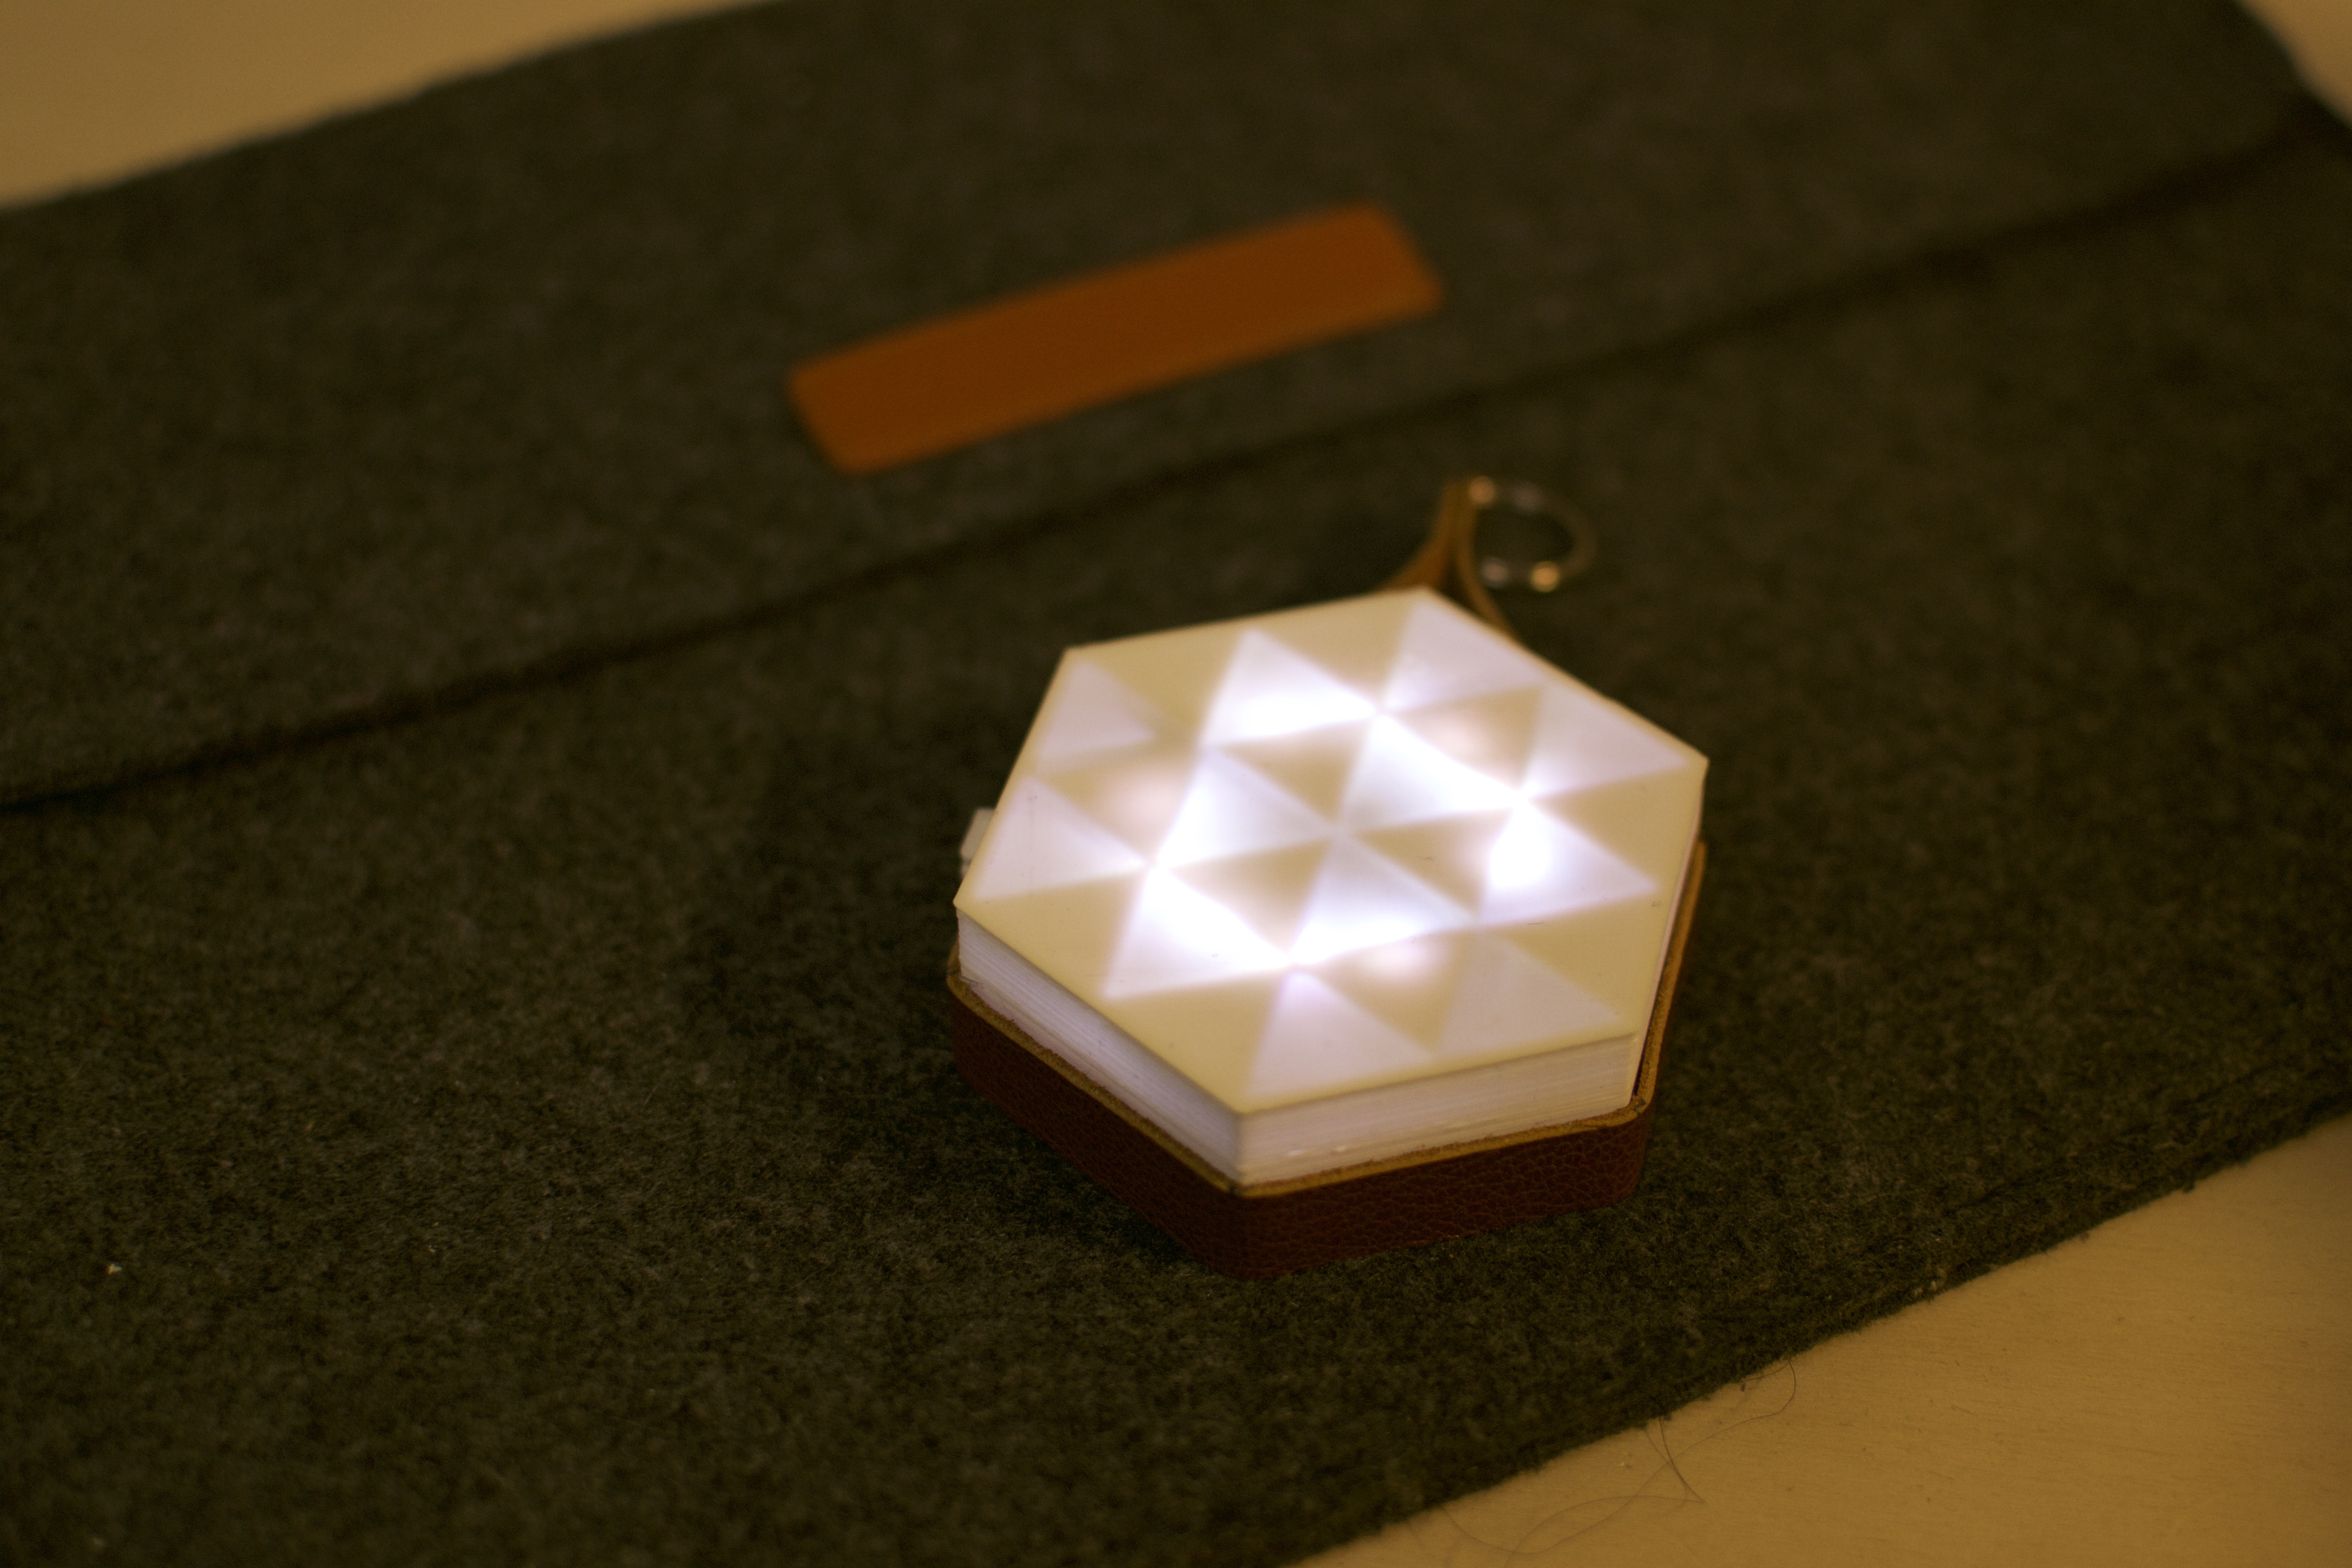
As far as the enclosure goes, I used Fusion 360 to model a simple, hexagonal snap fit case : the bottom part will house all the components, and the interchangeable tops feature different designs that reveal themselves only when the LEDs are on – and yes, I may have been heavily inspired by the Bernardaud candle holders – except in the short time I had it made more sense to give up on the intended pebble/galet elliptical shape, and go with an hexagon which would allow me to mount the micro USB LiPo charger behind a straight wall and not a curved one.
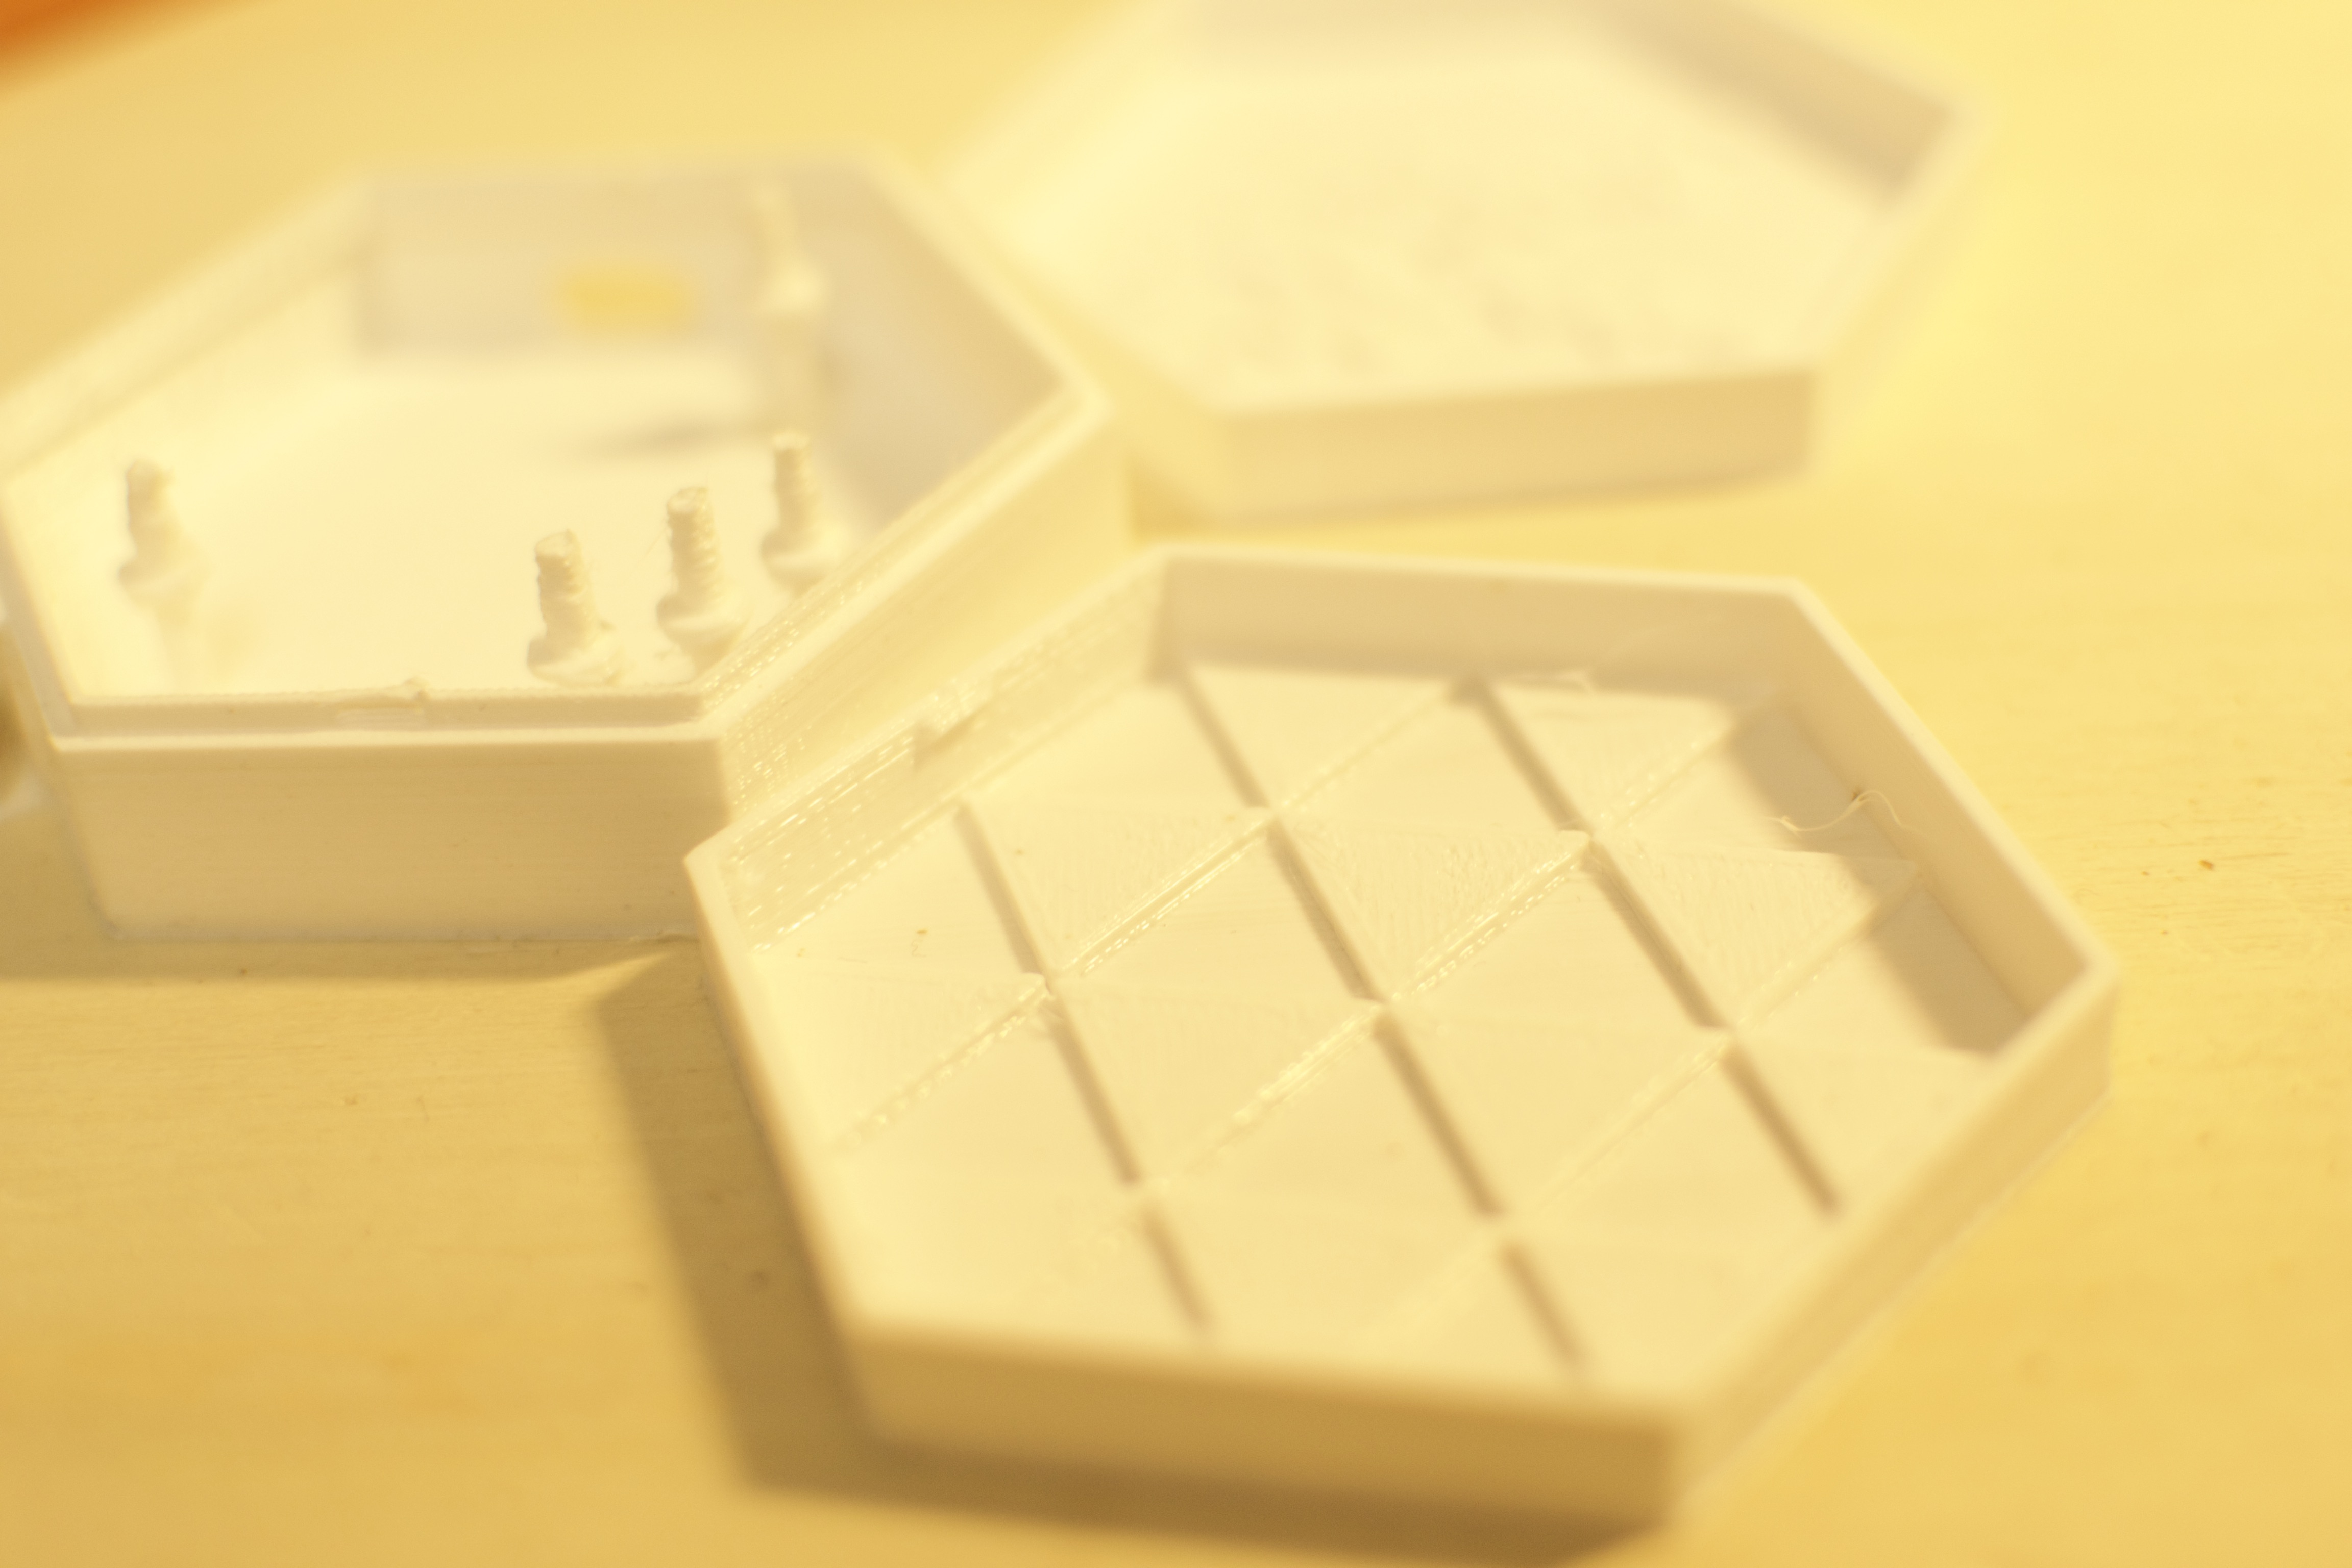
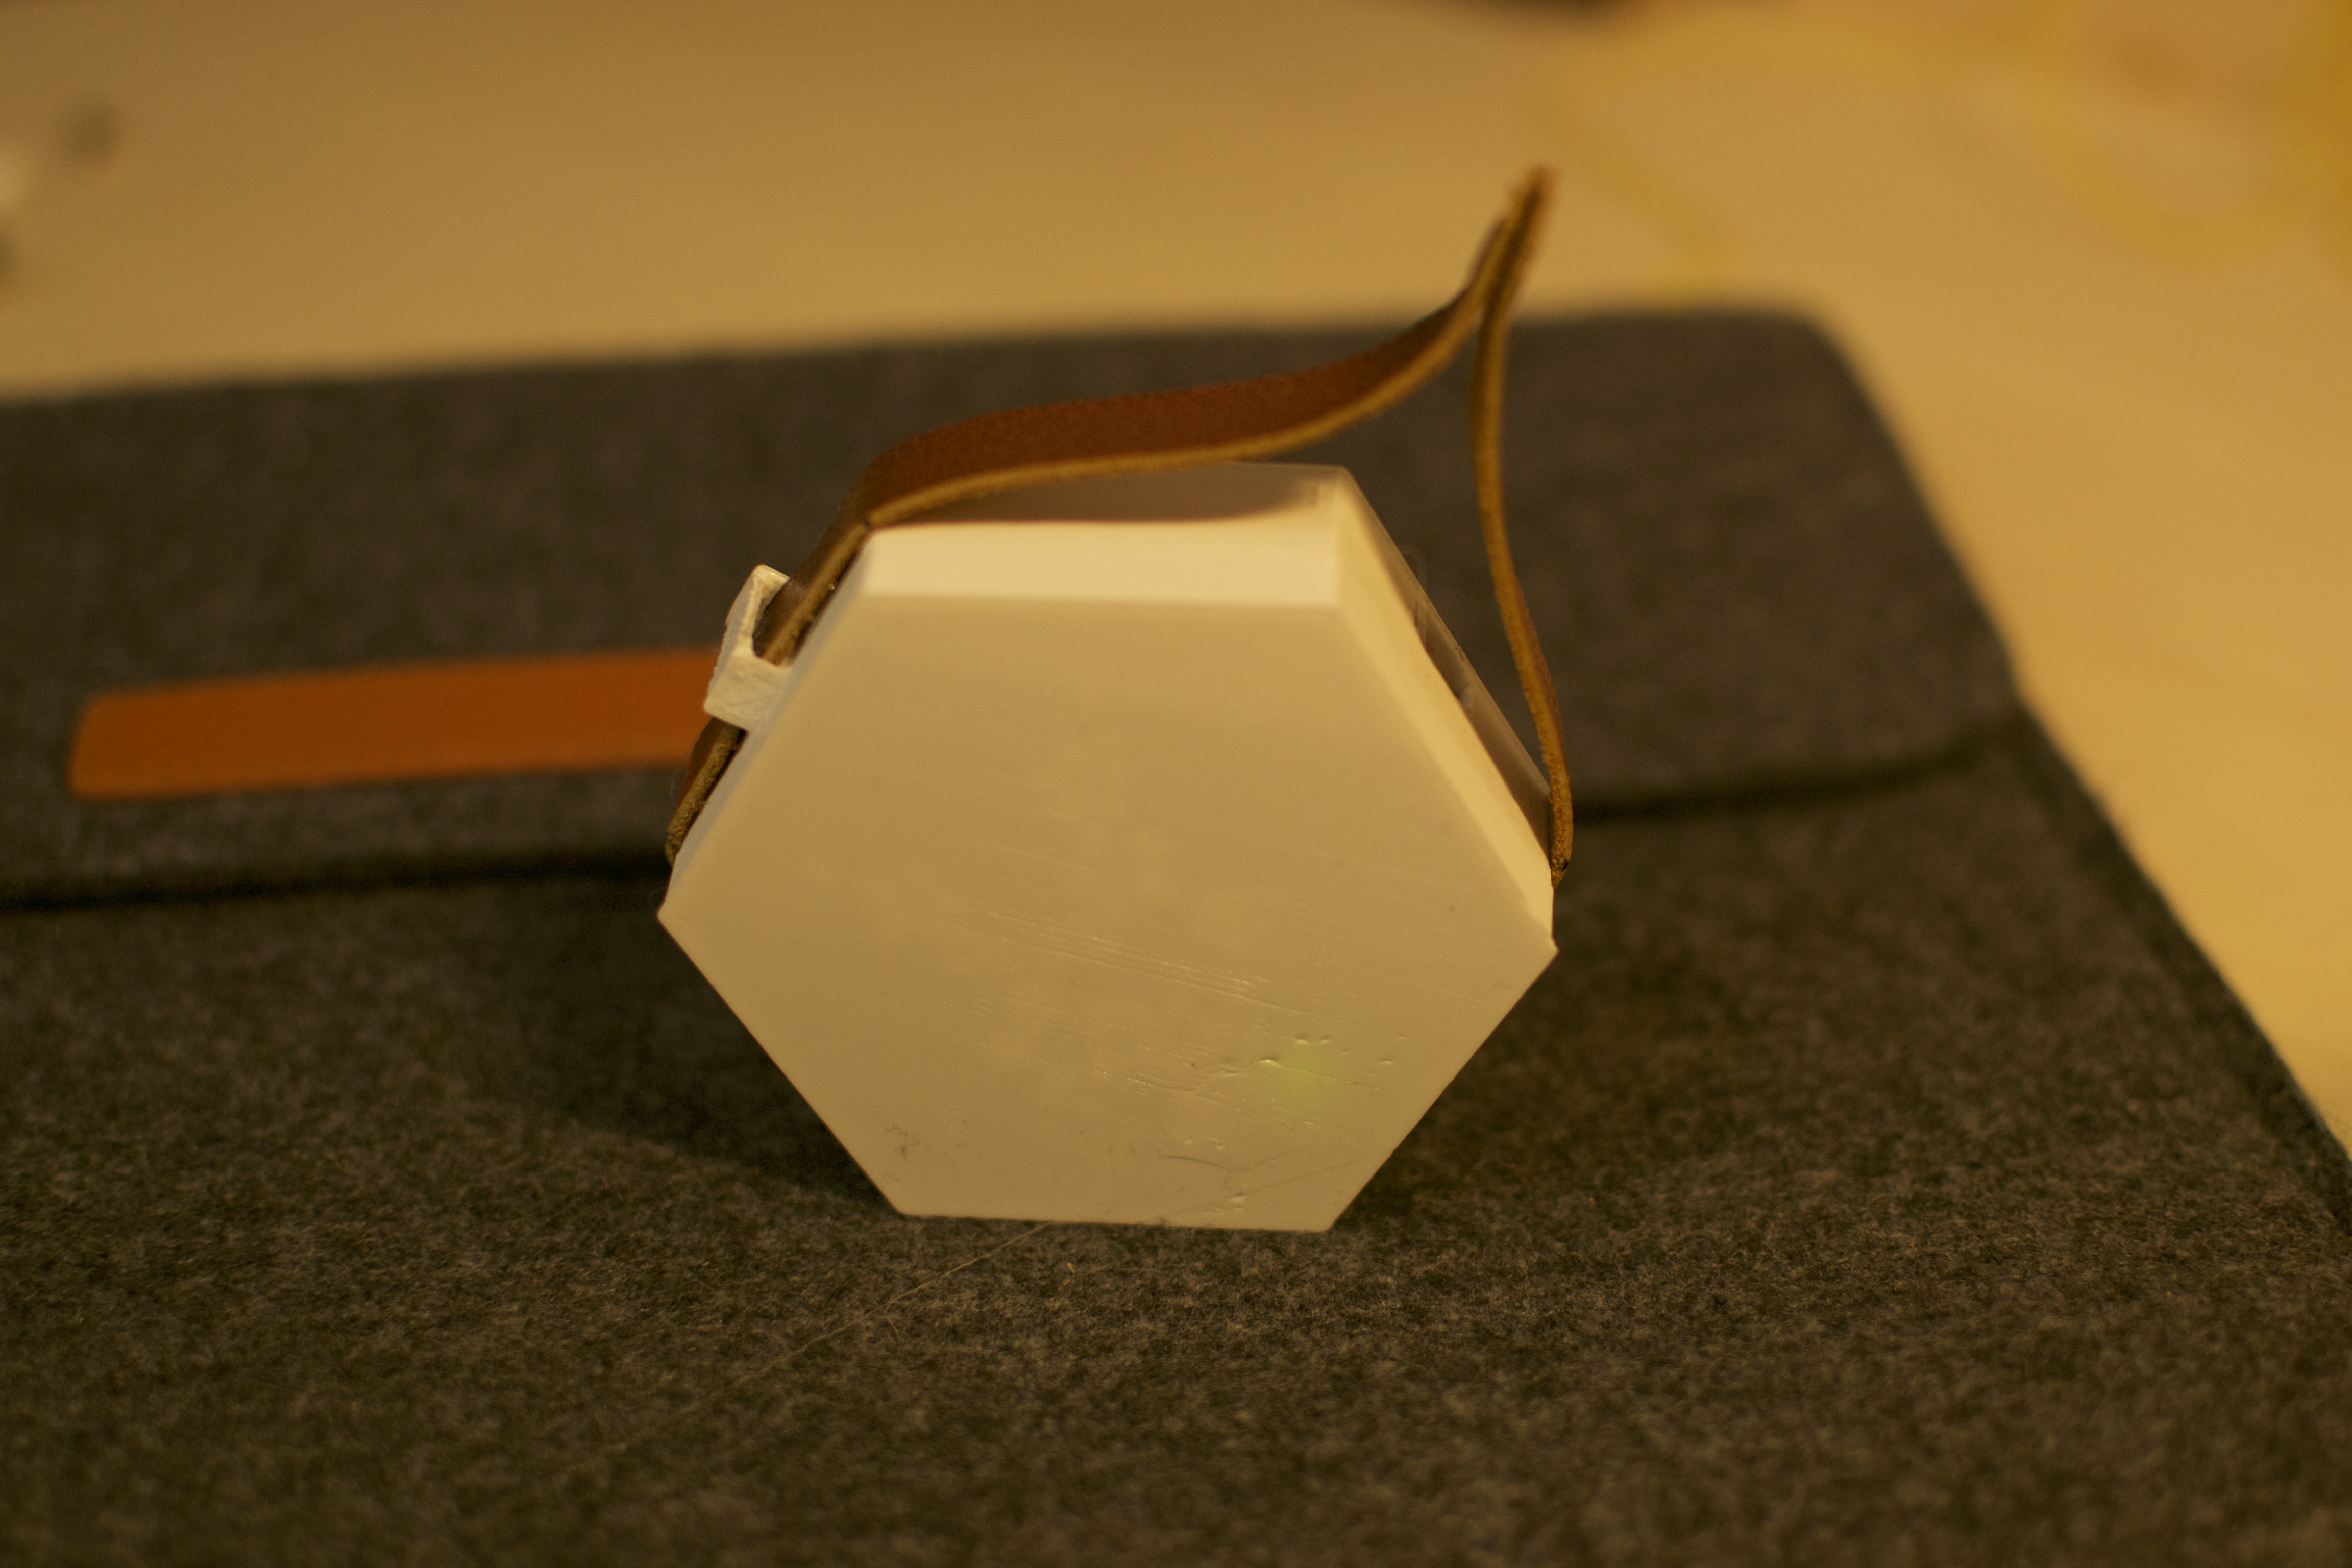
The final printed parts – I had them printed via 3DHubs by Alexandre who was kind enough to spend his saturday night 3D printing for me. Notice the slot for the micro USB charging cable, and the little bumps on the top part that actually go into notches on the lip of the bottom part and provide a secure snap fit

The LiPo charger is actually hot-glued to the bottom of the part since I wasn’t sure about adding standoffs for it just yet. Oh and if you’re wondering where the BLE module is, it’s actually taped to the back of the Circuit Playground #SpaceOptimization
Once I was done with the electronics, I wanted to add something more to the whole thing, so I cut a strip of leather (yes, hand cut, which would not have been my first option had it not been 4 AM)

Measure twice, cut once, and change your mind in between …
In an attempt to replicate real leatherwork, I made some little grooves using a cutter where the leather was going to be folded – if you choose to lasercut this piece (I will try and make a template and post the SVG here) you just need to engrave those lines to remove some of the material

I then glued the leather strap onto the four sides of the bottom part using hot glue, starting with the one on the picture, and proceeded to join the two ends with an eyelet – I won’t go into much detail about how much time and effort it took me to make two 4 mm holes in the leather but like I said, just use a laser cutter.
And here’s the “end” result, with the triangle design for the top :